Comprehensive Guide to Free Website Hosting -Part 2
Continuing where we left off in our previous post, let us look at some more methods with which we can have free hosting for our websites.
-
Self-hosting
-
Using a raspberry pi
-
Using a TV box
-
Using an old mobile of yours
-
Using an old laptop
-
The below content is still experimental! So please be aware of that.
4 Self Hosting
Well, now that the simpler ones are done, let’s continue to more interesting solutions. To continue, you are going to need some hardware for the next section of magic. Don’t worry though. It’s mostly an old smartphone, laptop or a TV Box or a Raspberry Pi that you can use for more than just hosting. And since you are going to have your own hardware, you will be able to use even WordPress on these solutions.
4.1 Using a Raspberry Pi
Raspberry Pi is a very low cost, low energy consuming device that has a wide variety of uses from use as a media server to automating your home and creating robots. You can follow these instructions to have a web hosting server on your Raspberry Pi.
Pre-requisites:
-
Raspberry Pi
-
Raspbian OS on it.
How to get a server running on a raspberry pi:
Well, my initial plans were to write a comprehensive guide to this. However,
the official guides present on Raspberry’s website are very comprehensive
and beginner friendly. Anything I write here will just be a copy paste of
it. Which makes no sense. So I will just leave you with a link to their
guide.
Here you go: Raspberry Pi
Wordpress
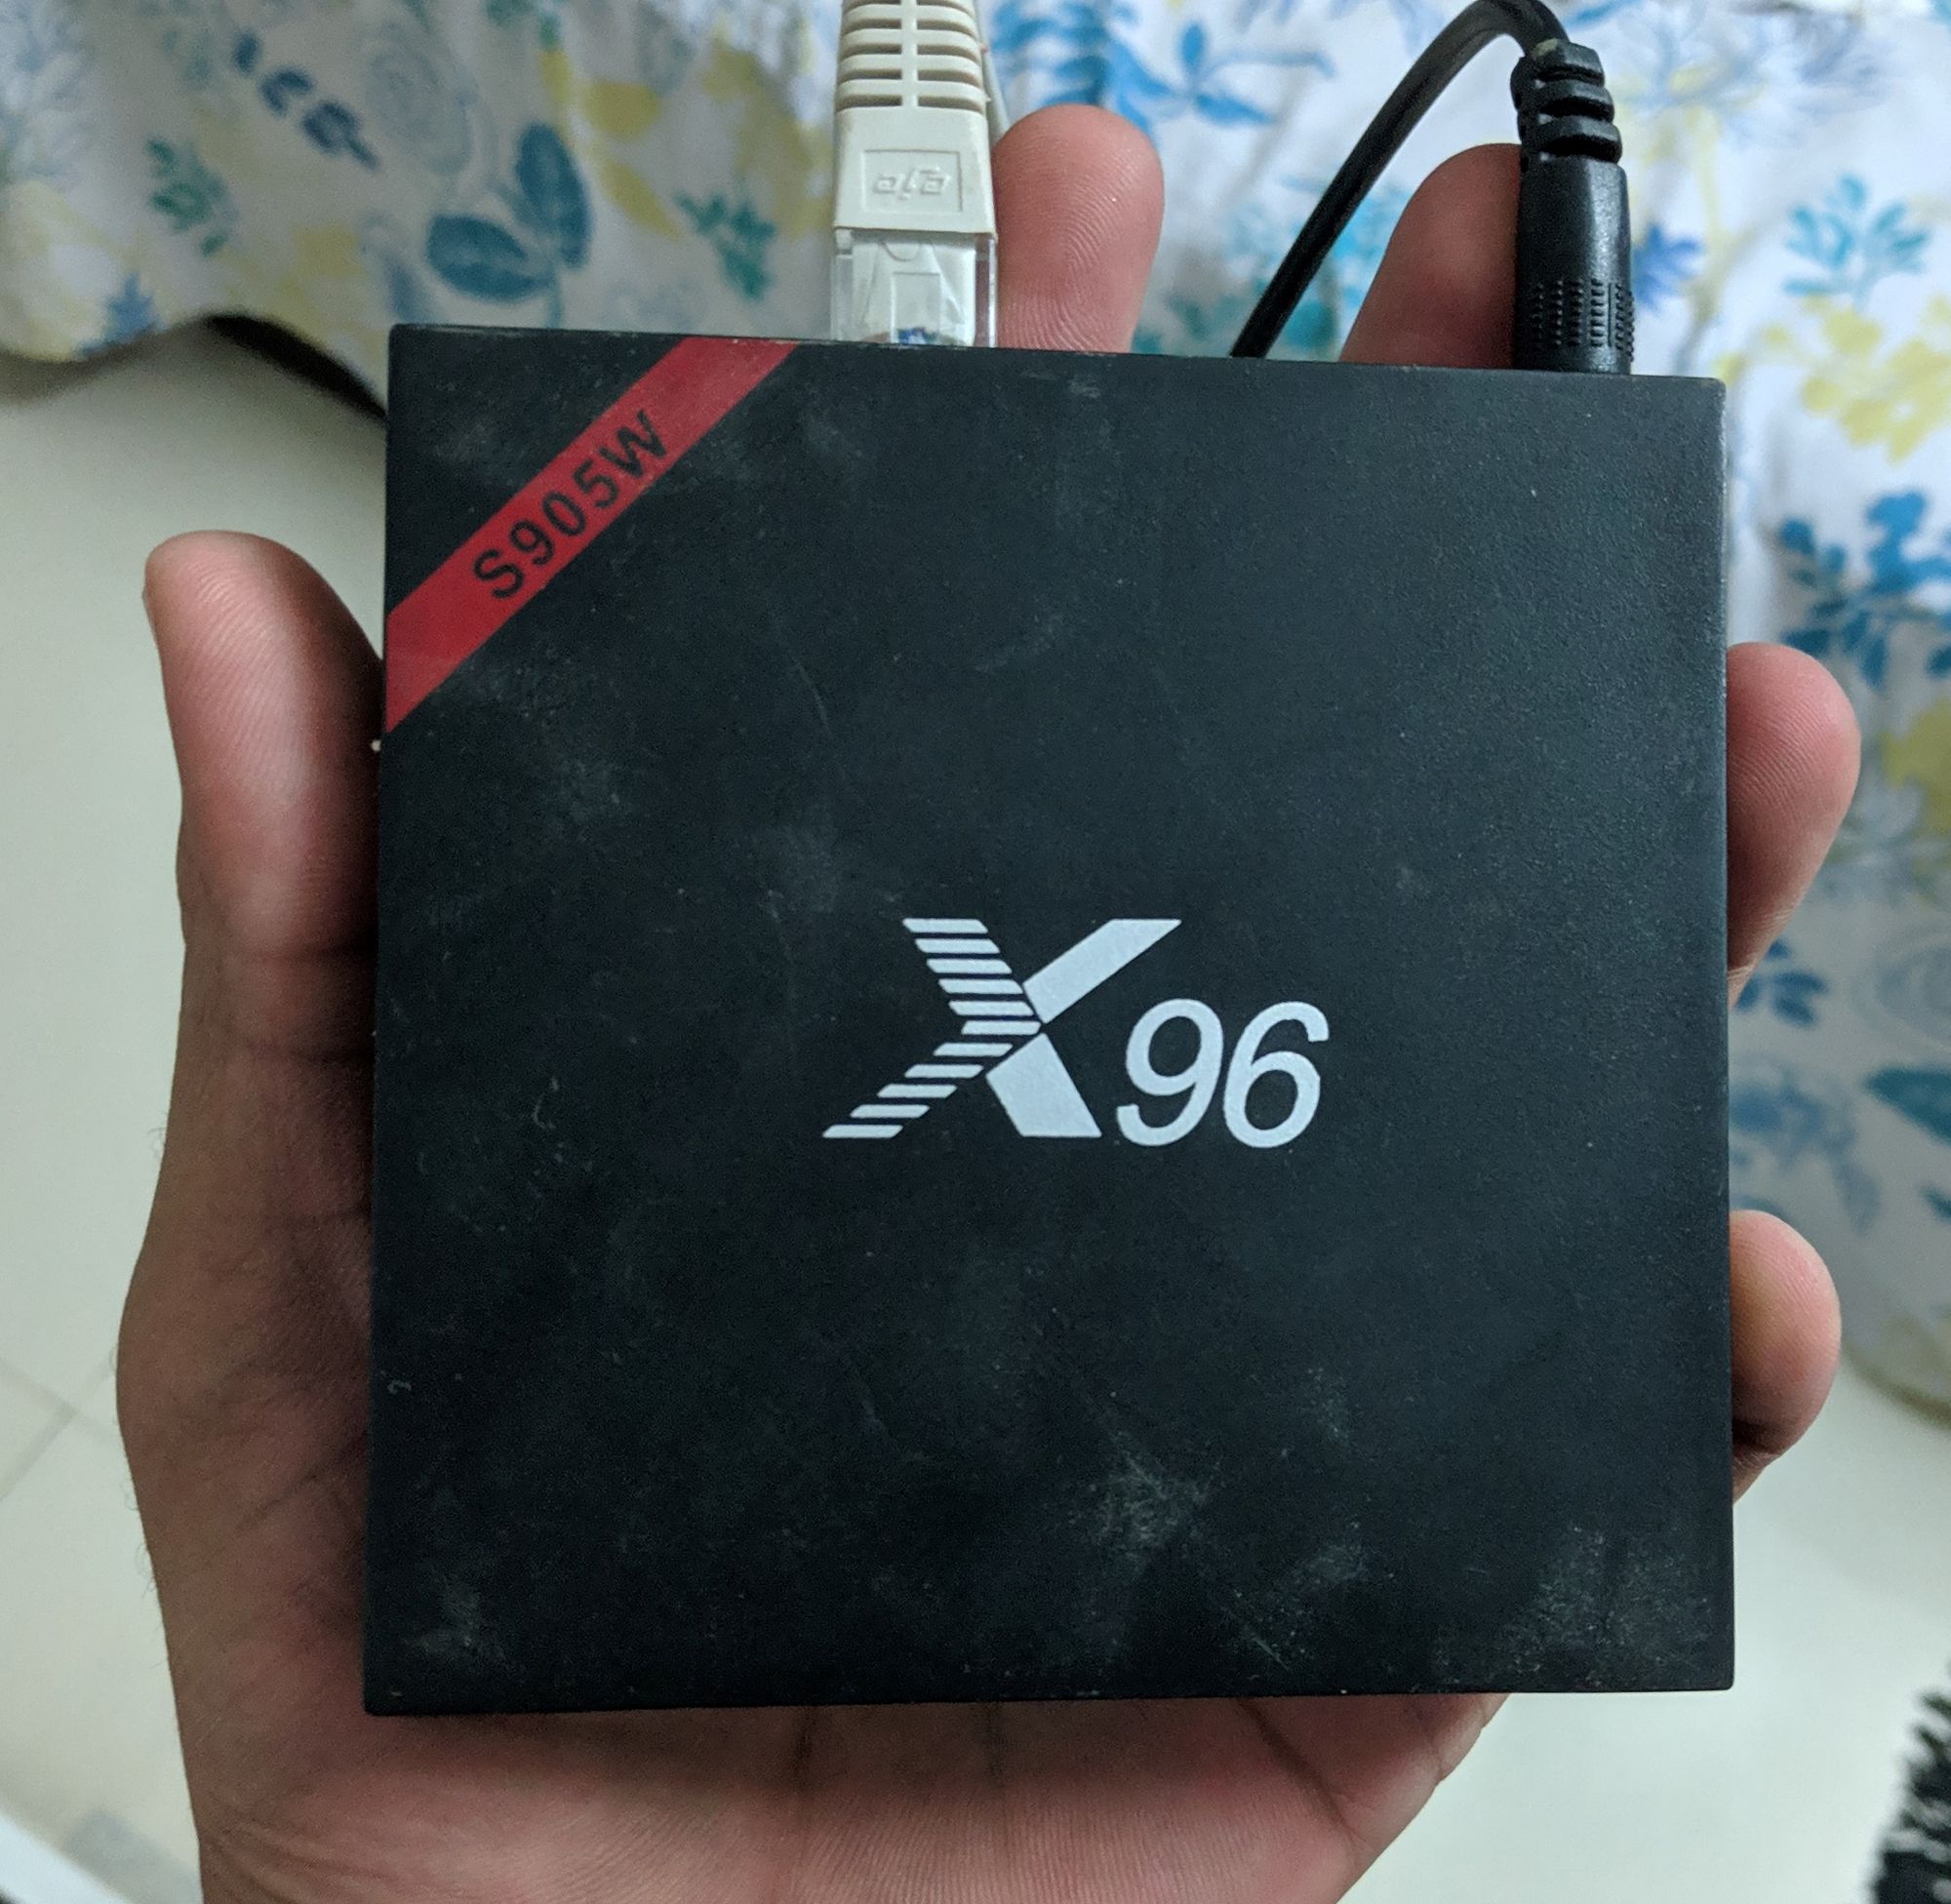
Like Raspberry Pi, you get these little low-cost Single Board Computer (SBC) based android TV boxes. The best part about them is that they all have open hardware that you can use to hack and run Debian/Ubuntu. Be it a server or a full desktop environment. I have a TV Box named X96 Mini. This name is not very important. It has an Amlogic S905w chipset. Now this part, is very important. You will have to find community builds for your chipset. The communities for these SBCs are very vibrant and active. I suggest you take part in them.
I use this TV Box: X96. If you are going to buy one now, I highly recommend against that model though. My box’s wifi and bluetooth got borked within a couple of days. I did get a partial refund from Banggood though. Anyway, at the time of writing, I would recommend this one: H96 or this one: H96 Max. Both of these use different chipsets but have support available. The same guy (balbes150) that builds distros for the product I have builds for these chipsets as well. I have checked and debian and ubuntu are available with all basic functions available.
Let’s get started using the S905w TV Box that I have.
-
Go here and download the latest image ile of your choice for your model. You may have to search around if you have a different chipset. Again, the name of your product does not matter. Just this chipset used does.
-
Extract the image using 7zip or similar.
-
Using either etcher or similar program, write the image to a fast USB with atleast 16GB. You may also use an SD Card.
-
Turn off your box and insert the USB into your Box.
-
You may have to use a toothpick to press a hidden reset button in the AV slot. Use youtube for your model. You are on your own with this as the method varies for each manufacturer. Mine boots using the USB if its inserted. No further steps necessary.
-
You will boot up into your distro. Login using username: root and password: 1234 the first time. You will have to set up things like a new username, a new password, etc.
-
Next up, assign a static local IP to your box and forward port 80 to it on your router. The methods for each router would be slightly different. You will have to search around for this. You can find an example for this on section 2.3.4
-
Once that’s done, you may proceed to installing the LAMP server and WordPress. This is the same as what you have in Section 3.4
-
Alternatively, you may use the built in armbian config to install ISPConfig. ISPConfig is a web panel like Virtualmin and cPanel. This will make adding new websites and apps a lot more user freindly.
4.3 Using an old smartphone
Old smartphones are still quite powerful and power efficient to be used as
servers.
The basic part involves setting up a server on your mobile using either server apps like Servers Ultimate or the free ones like: Apache Server
and PHP Server
Servers Ultimate is paid and a bit costly. But quite worth it. Do consider it.
The basic steps to have a web server running on your smart phone are quite
simple:
4.3.1 Using Servers Ultimate:
Create the Servers
-
Go to WordPress.org and download the WordPress web software to your PC. Extract the archived files to a single folder on your PC. Copy this folder, preferably, to the root of your device SD Card
-
Start the Servers Ultimate app on your device, click on the “+” sign on the top right of your screen
-
Select “MySQL server”
-
Give the server a name and save it. Named mine “wp_mysql” (without the quotes, of course)
-
Again, click on the “+” sign on the top right of your screen
-
Select “PHP and Lighttpd Server”
-
Give the server a name. Named mine WordPress. Do not exit the screen just yet!
Configure the services
-
Select the next tab labelled “Specific”
-
Look under “Servers”, ensure the options “Enable Lighttpd Server” and “Enable PHP Server” are checked.
-
Scroll down and look under “Document Root”. Browse to the WordPress folder on your phone and select it.
-
Under “Server Tag”, you may enable all the options, especially “Enable PHPMyadmin”
-
Now press save. The screen will exit.
-
From the Server Ultimate default screen, click the start icon to start the two servers, “WordPress” and “wp_mysql”
-
Now right-click on the server labelled WordPress. From the context menu, select Information. Note the IP address that has been assigned to it. It will be in the form http://192.168.xxx.xxx:8082/
Create Database
-
Go to the following URL http://192.168.xxx.xxx:8082/phpmyadmin/
-
Log in with the following credentials; Username is “root”. Leave the password blank
-
Click on the “Databases” at the top left of the screen
-
Enter “wordpress_db” in the Create Database field and tap Create
Final Installation
-
Type the following URL in your browser to start the WordPress installation; http://192.168.xxx.xxx:8082/wp-admin/install.php
-
When prompted fill in wordpress_db in the Database Name field
-
Fill in root in the User Name field
-
Leave the password field blank
-
On the Welcome Page, fill in the details requested for, then click Install WordPress. On completion, you will be taken to the admin page of your website.
-
To view the front end, your type the IP address 192.168.xxx.xxx to your browser.
As it is, you can only view your site from within your LAN. In the next part of this post, we would go through the paces on how to access your new site from anywhere on the Internet.
4.3.2 Make Your Server Accessible From the Web
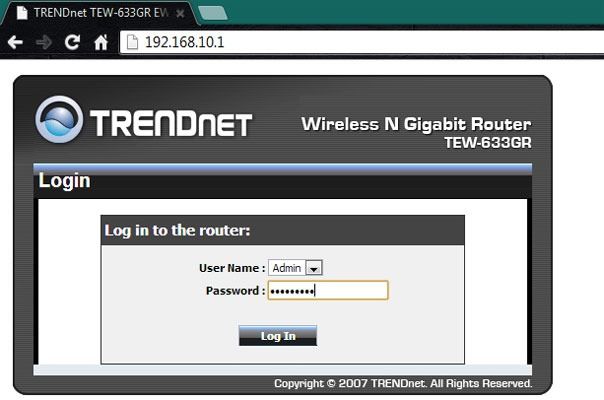
If you want users outside of your local network to see your web server, you must make a few tweaks to your router settings. Every brand of router has its own administration menus so the names of menus and fields will vary slightly, but these are the general steps you must take to make your Android web server available on the Internet.
- Log into your router's administration page from your PC. If you don't
know its IP address, check the user's manual for your router.
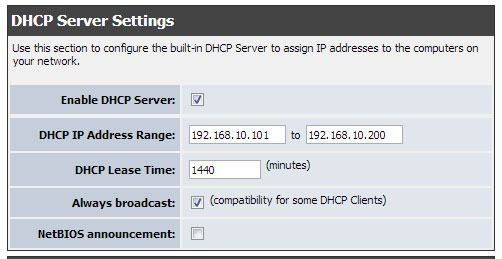
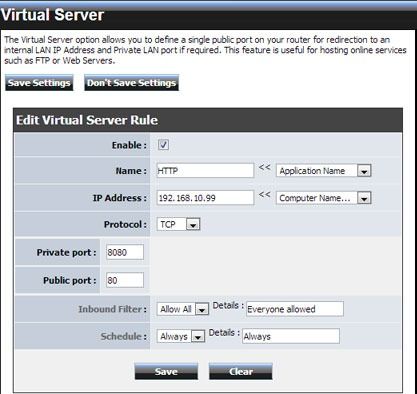
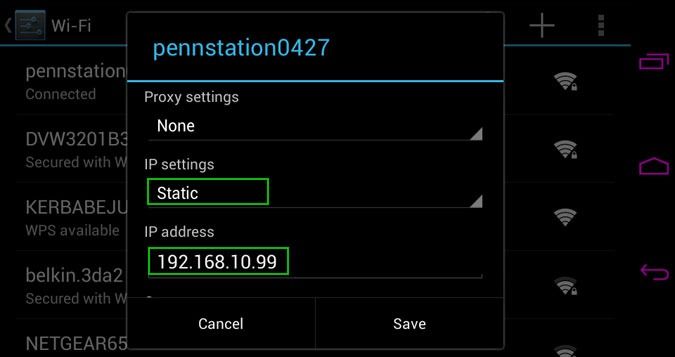
2. **Make a static IP address available for your Android device**. Local IP addresses tend to start with 192.168.10.1 and go up from there. If your router provides DHCP (dynamically assigned IPs) to an address range, anything lower than that range will be available for a static assignment. For example, our router uses addresses 192.168.10.101 to 192.168.10.200 for dynamic assignments so we chose to give our phone the 192.168.10.99 address. Some routers will also let you reserve a specific address.
3. **Configure your router to forward port 80 to port 8080 on the static IP address** you're assigning to your Android device. On our router, this function was labeled "Add virtual server" but on others it will called "port forwarding."
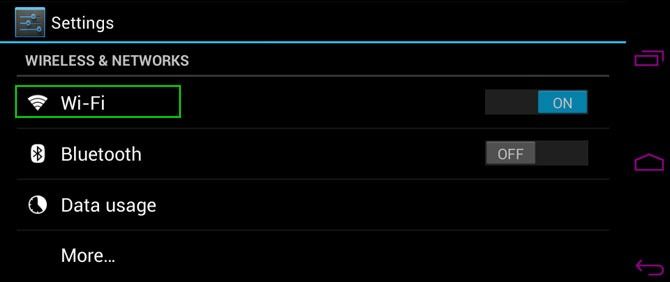
4. Navigate to the Wi-Fi menu on your Android device.
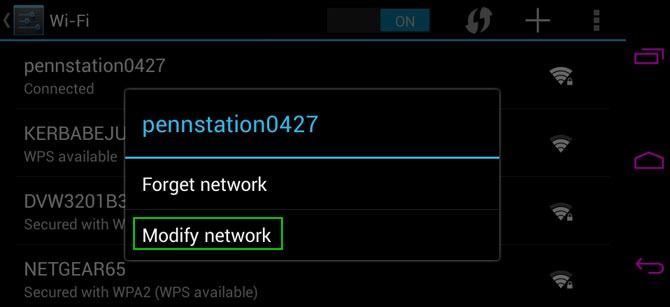
5. Long press the name of your Wi-Fi network and select Modify Network.
6. Check show advanced options.
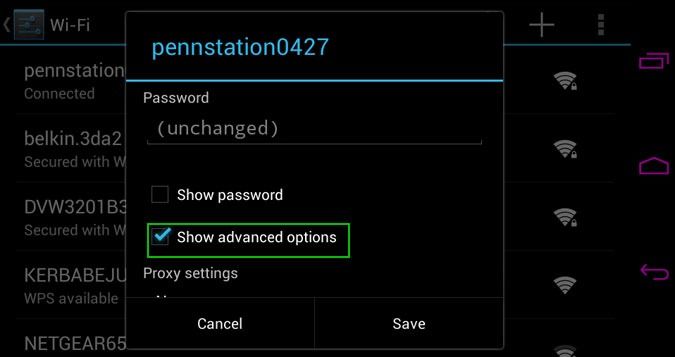
7. Select Static under IP settings and enter the static IP address you chose(or reserved) and tap Save.
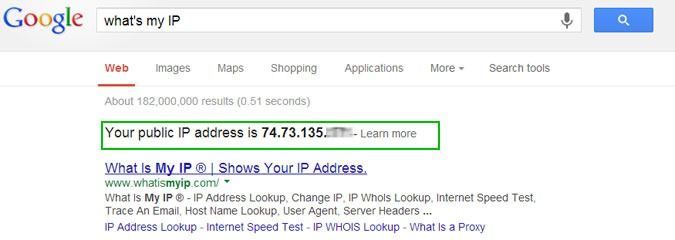
8. Search Google for the term "What's My IP" to find your router's public IP address. Google will display it above the search results.
Anyone on the Internet will now be able to navigate to your site, as long as you give them this IP address to use. Unfortunately, unless you pay for a plan with a static IP address, your number could change the next time your router reboots. You can solve this problem by purchasing a domain and using a dynamic DNS service such as dyn.com that always directs that domain to your current IP address, no matter how often it changes. Alternatively, you could use a cron to execute a bash script that updates the IP using Cloudflare API. I will write a complete tutorial on this later.
It is theoretically possible using a smartphone as a web server with mobile
Internet as well. But since this is just a proof of concept at the moment, I
will write a different post. In the future when 5G and IoT become the norm, this method is likely to work better.
4.4 Using an old Laptop
Laptops as old as those from 2012 are still quite powerful for a working as a web server. It is quite straightforward to set these up.
-
Install Debian server or any other server of your choice.
-
Follow steps from Section 3.4
-
Setup your router using steps from Section 2.3.2
The only downfall with this method is that it consumes a fair bit more
electricity. Not the ideal Option.
Dynamic IP
When you try to make your website accessible through the internet, you may notice that your home Internet address keeps changing. This is happens because a static IP that does not change is a costly commodity as it's available in limited numbers. Thus Internet Service Providers provide randomly available IPs called Dynamic IPs. Or alternatively create subnets and provide local addresses.
If you are on a local internet service provider, you likely have a dynamic IP. You may check your IP by just googling for it. If the IP shown in your google search result and and the one shown on your device are same, it's a dynamic IP. If different, they are using a subnet.
Let's get to the more interesting part. To make your website accessible from the internet with these conditions, you need a service that constantly updates the current IP to the DNS. There are many services out there like DynDNS or afraid.org that provide dynamic updating of DNS. afraid.org is a free service but has a few constraints of it's own. DynDNS on the other hand does not provide a main domain to be used on it's free plan.
Cloudflare provides very fast DNS and also provides REST API. This can be used to achieve our purpose. Let's get started.
Gather information
You need to get your:
- API Key
- email-id
- Domain name
- Linux shell
Type in this into your shell:
curl https://www.cloudflare.com/api_json.html -d ‘a=rec_load_all’ \
 -d ‘tkn=your-api-key’ \
 -d ‘email=your_account@email-address.com’ \
 -d ‘z=your-domain.com’
This will give you all the info you are going to need to automate the IP address changes.
Now create a script like this:
#!/bin/sh
NEW_IP=`wget -O — -q http://ident.me/`
CURRENT_IP=`cat /var/tmp/current_ip.txt`

if [ “$NEW_IP” = “$CURRENT_IP” ]
then
  echo "No Change in IP Adddress"
else
  curl https://www.cloudflare.com/api_json.html \
  -d 'a=rec_edit' \
  -d 'tkn=your-api-key' \
  -d 'email=your_account@email-address.com' \
  -d 'z=your-domain.com' \
  -d 'id=record-id' \
  -d 'type=A' \
  -d 'name=subdomain.your-domain.com' \
  -d 'ttl=1' \
  -d "content=$NEW_IP"
  echo $NEW_IP > /var/tmp/current_ip.txt
fi
This basically gets your current IP from ident.me and updates your DNS. Of course, you need to change "your-api-key", "your_account@email-address.com", "your-domain.com", "record-id" and "subdomain.your-domain.com" from the values you recieved from the curl operation.
Note: If you need a IPv6, try using work done by this guy: Scott Helme
Then,
sudo chmod +x /path/to/script.sh
Test it out by running it in your linux environment.
sudo /path/to/script.sh
Once that's done, you need to automate the running of this on a regular basis. Let's use cron for this. You can add this to your crontab:
*/5 * * * * /path/to/script.sh
Further References:
- Raspberry Pi Docs: Raspberry Pi Wordpress
- Armbian Forum: Armbian Forum
- Servers Ultimate: Servers Ultimate
- Dynamic IP using Cloudflare: Medium
- Dynamic IP using Cloudflare: johnpili.com